Mounting & installation · 3 min read
How to line up a gallery wall when the frames don’t match
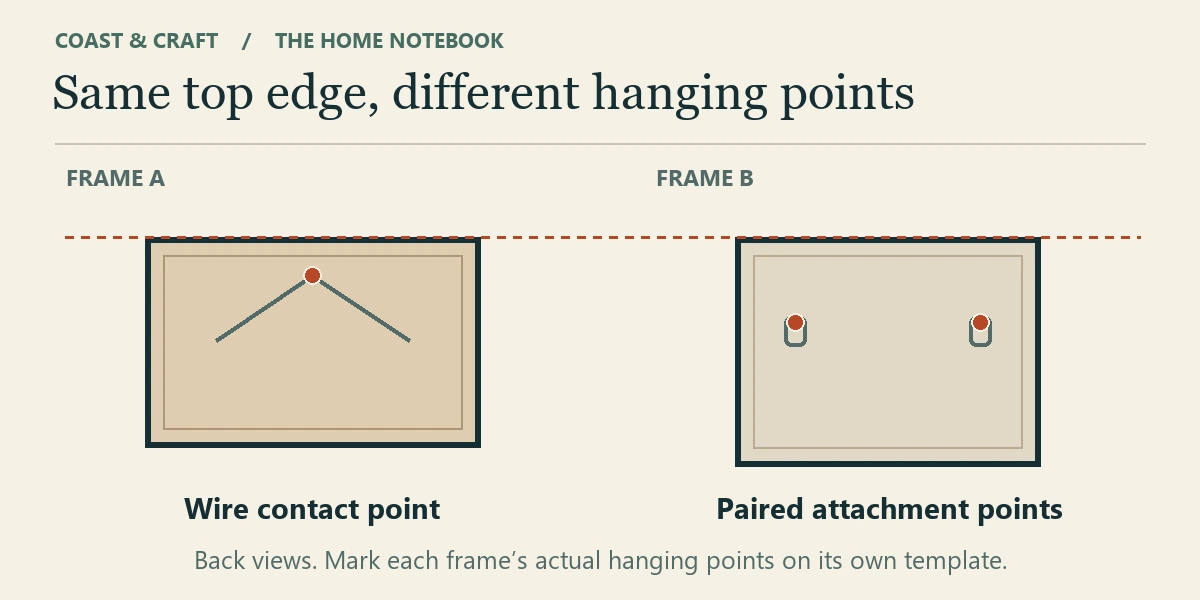
Two frames can have the same outside dimensions and hang at different heights from level hooks. A wire on one may sit much lower than a sawtooth hanger on the other. Start by deciding where you want the frame edges, then work back to the support point for each piece.
Lay out the group above the furniture
If the pictures belong above a sideboard, use its center as a starting point. Measure the outside widths of the frames, including their borders. For example, frames 12, 16 and 10 inches wide with two 2-inch gaps make a 42-inch row. Mark out that span and check what a lampshade hides from the doorway. Above a sofa, check where someone’s head rests when they lean back.
Framebridge suggests trying gaps of 2 to 3 inches between frames. Cut a strip of card to your preferred gap and use it between the paper outlines on a table. With different frame heights, try aligning the tops of one pair first. A taller piece can extend below that line without forcing every other frame into a row.
Give each outline its own hanging marks
Cut paper to the outside size of each frame and number the matching frame and outline. Mark the top and left as you would see them from the room. If a frame has two rings meant to hang separately, transfer both positions to the paper, including their distances from the sides. A template copied from the back can put an off-center hanger on the wrong side.
For a frame designed to hang by a wire on one hook, Framebridge measures from the top edge to the center of the wire drawn upward into its hanging position. Suppose two frame tops should line up. If one hanging point sits 1 inch below its top and the other sits 3 inches down, the second frame needs its support 2 inches lower. That mark shows where the wire rests in the hook. The hook’s nail may enter the wall higher up.
Choose hardware for each finished frame
Record the weight of each complete piece, including glass and backing, and identify the wall material if you know it. For example, 3M makes its CLAW picture hangers for drywall. It allows two hangers for a frame with two separate attachment points, but the whole frame must still fall within the weight limit printed for one hanger.
If holes are restricted, first check which removable products the property owner allows. Command advises against its strips on wallpaper, brick and rough concrete. On an approved surface, check the specific picture-hanging product’s package for the supported weight and required number of strips.
Keep a record of the arrangement
Preview the numbered outlines on the wall using temporary tape if the finish allows it. Step back to your usual spot, then photograph the layout with the furniture in view. Note the gap above the sofa or sideboard. If you request installation, include the photo, frame weights and pictures of the backs. Flag any heavy piece you can’t safely move and confirm who will supply the hardware.
Sources & product details
Manufacturer instructions for your exact product take precedence over general planning guidance.